How to Customize your Facebook Fan Box
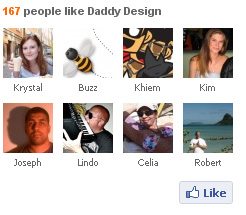
With the addition of a facebook fan box to your website you’re not only benefiting your end users but also yourself. The fb fan box allows users to directly view how many friends you have on your facebook page and also allows them to become a fan with just one click. The only potential downsides to adding a fan box to your page is that it is not easy to customize or the original styling just doesn’t match up with the unique style of your site. Well not anymore, in this tutorial we are going to teach you how to customize your very own facebook fan box.
This tutorial will teach you step by step how to customize your facebook fan box to look like ours. After completing this tutorial you should be able to play around with the code and make modifications that you see fit to change the styling to your own needs.
5/16/13 – It seems that this time Facebook has officially stopped this code from working any longer 🙁 we will update this post if we figure out any new ways.
4/29/10 – This tutorial has been updated to allow full customization of the Facebook Fan Box and positioning of the new “Like” button.
Setting Up Your Widget
Step 1 – Get Your Facebook Fan Box Code
First things first you need to get the code for your facebook fan box from facebook, your code should look something similar to the code below.
<script type="text/javascript" src="http://static.ak.connect.facebook.com/js/api_lib/v0.4/FeatureLoader.js.php/en_US"></script>
<script src="http://connect.facebook.net/en_US/all.js#xfbml=1"></script>
<fb:fan profile_id="34572893685" stream="0" connections="10" logobar="0" width="300"></fb:fan>
<div style="font-size:8px; padding-left:10px"><a href="https://www.facebook.com/wordpressdesign">Daddy Design</a> on Facebook</div>
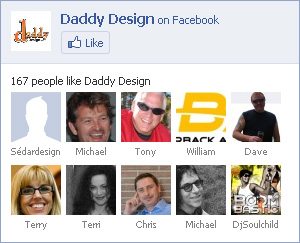
Step 2 – Linking Your CSS
The second step is to set up the linking to your css code and adjusting your facebook fan box code to allow for the customization you’re about to start. The div associated at the end of the original fan box code is only a link back to your facebook page, we decided to remove it, however you may choose to leave it. Items that we have changed in our code are the width from 300 to 240 and connections from 10 to 8, your width and number of connections may change depending on the space available for your fan box. Items we have added are height at 200 (also subject to change) and the line of code to link to our css stylesheet. Please view the updated coded below.
<script type="text/javascript" src="http://static.ak.connect.facebook.com/js/api_lib/v0.4/FeatureLoader.js.php/en_US"></script>
<script src="http://connect.facebook.net/en_US/all.js#xfbml=1"></script>
<fb:fan profile_id="34572893685" stream="0" connections="8" logobar="0" width="240" height="200" css="http://www.yoursite.com/stylesheet.css?1"></fb:fan>
One important item to take notice of is ‘?1’ which appears at the end of the css link, this item is the cache level for the facebook fan box, every time you make changes to the css inside your stylesheet and upload to your server you must change the number after the question mark to correspond with the number of edits you have made.
Here’s another handy tip, if you are using wordpress you can insert your code to look like the code below, this will link straight to your wordpress stylesheet. (Make sure you edit the ‘?1’ accordingly.)
css="<?php bloginfo('stylesheet_url'); ?>?1"
Styling Your Widget with CSS
Step 1 – Styling the Main Widget
The first step in customizing the css is to fix link hover issues and to remove any unneeded styling from the main widget. Check the first set of css modifications below.
.fan_box a:hover{
  text-decoration: none;
}
.fan_box .full_widget{
  height: 200px;
  border: 0 !important;
  background: none !important;
  position: relative;
}
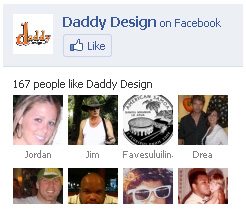
In lines 1 through 3 of the code we have removed the underline hover effect for all links inside the fan box to avoid any type of conflicts. In lines 4 through 9 of the code we have removed the border from around the full fan box widget, set the height to match our widget height, removed the background, and positioned it to allow for the moving of the “Like” button. One thing to keep notice of is the usage of ‘!important’, this is a css trick that will override the already used css code inside of the widget, anything that we change that currently has any values associated with it must use this code or else the original code will still take priority.
Step 2 – Styling the Widget Header
The second step in customizing the css is to adjust the fan box header. Check the second set of css modifications below.
.fan_box .connect_top{
  background: none !important;
  padding: 0 !important;
}
.fan_box .profileimage, .fan_box .name_block{
  display: none;
}
.fan_box .connect_action{
  padding: 0 !important;
}
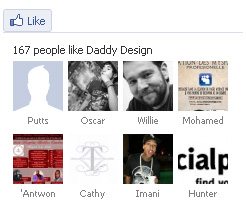
We are basically going to be getting rid of everything in the widget header except for the “Like” button, which we will position to the bottom of our widget later. In lines 1 through 4 we have gotten rid of the light blue background color for the header and removed all of the headers padding. In lines 5 through 7 we have completely removed both the main profile name and image. In lines 8 through 10 we have removed padding associated with the “Like” button that was not needed.
Step 3 – Styling Fan Connections
The third step in customizing the css is to adjust the actual fb fan connections. Check the third set of css modifications below.
.fan_box .connections{
  padding: 0 !important;
  border: 0 !important;
  font-family: Arial, Helvetica, sans-serif;
  font-size: 11px;
  font-weight: bold;
  color: #666;
}
span.total{
  color: #FF6600;
  font-weight: bold;
}
.fan_box .connections .connections_grid {
  padding-top: 10px !important;
}
.fan_box .connections_grid .grid_item{
  padding: 0 10px 10px 0 !important;
}
.fan_box .connections_grid .grid_item .name{
  font-family: "lucida grande",tahoma,verdana,arial,sans-serif;
  font-weight: normal;
  color: #666 !important;
  padding-top: 1px !important;
}
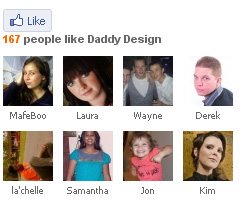
In lines 1 through 8 of the code we adjusted the padding surrounding the fan box connections, removed the border at the top, and adjusted the font for the line of text that displays “X people like Profile Name”. In lines 9 through 12 of the code we have adjusted the color and font weight of the number of fans displayed. In lines 13 through 15 of the code we have adjusted the padding between the line of text and the actual fan connections. In lines 16 through 18 of the code we have adjusted the padding between the actual fan connections. In lines 19 through 24 of the code we have adjusted the actual fan name, make sure that you DO NOT change the font family, if changed it may cause alignment issues with the connections.
Step 4 – Positioning the “Like” Button
The fourth and final step in customizing the css is to position the “Like” button. Check the fourth and final set of css modifications below.
.fan_box .connect_widget{
position: absolute;
bottom: 0;
right: 10px;
margin: 0 !important;
}
.fan_box .connect_widget .connect_widget_interactive_area {
margin: 0 !important;
}
.fan_box .connect_widget td.connect_widget_vertical_center {
padding: 0 !important;
}
With the addition of this block of code the “Like” button will now appear at the bottom right of our fan box widget. How does this work? It works because earlier we used relative positioning on the main widget div in Step 3, whenever relative positioning is used on an element you can then use absolute positioning to position another element anywhere inside of the main element. The way to position the element is by using the attributes top, bottom, left, and right depending on where you want to move the element. In our situation we wanted it to be at the bottom right of our widget so we used the attribute bottom with a position of 0 and right with a position of 10px. The reason we used 10px for right instead of 0 is because we had added 10 pixels of right padding to each of our fan connections, this way the button and fan image will line up correctly. Lines 1 through 6 of the code are used to position the actual div to the bottom right of the widget. In lines 7 through 12 of the code we have removed padding and margin associated with the “Like” button and its surrounding table data so that it will align properly.
Complete CSS Code
Below is all of the css code from the previous 4 steps combined together.
.fan_box a:hover{
  text-decoration: none;
}
.fan_box .full_widget{
  height: 200px;
  border: 0 !important;
  background: none !important;
  position: relative;
}
.fan_box .connect_top{
  background: none !important;
  padding: 0 !important;
}
.fan_box .profileimage, .fan_box .name_block{
  display: none;
}
.fan_box .connect_action{
  padding: 0 !important;
}
.fan_box .connections{
  padding: 0 !important;
  border: 0 !important;
  font-family: Arial, Helvetica, sans-serif;
  font-size: 11px;
  font-weight: bold;
  color: #666;
}
span.total{
  color: #FF6600;
  font-weight: bold;
}
.fan_box .connections .connections_grid {
  padding-top: 10px !important;
}
.fan_box .connections_grid .grid_item{
  padding: 0 10px 10px 0 !important;
}
.fan_box .connections_grid .grid_item .name{
  font-family: "lucida grande",tahoma,verdana,arial,sans-serif;
  font-weight: normal;
  color: #666 !important;
  padding-top: 1px !important;
}
.fan_box .connect_widget{
position: absolute;
bottom: 0;
right: 10px;
margin: 0 !important;
}
.fan_box .connect_widget .connect_widget_interactive_area {
margin: 0 !important;
}
.fan_box .connect_widget td.connect_widget_vertical_center {
padding: 0 !important;
}
Troubleshooting
If you are trying to edit the css and no changes are showing up, make sure you are adjusting the cache level at the end of the css link in the widget code.
If you are having problems getting this tutorial to work please reread the tutorial and try again, if you still can not get it to work please leave us a comment below and we will respond as soon as possible.
Notes and Fixes
11/20/2012 – If you Fanbox has stopped displaying, this is becuase Facebook has made another change, so you must fix change this line of Javascript from
<script type="text/javascript">FB.init("1690883eb733618b294e98cb1dfba95a");</script>to
<script src="http://connect.facebook.net/en_US/all.js#xfbml=1"></script>4/20/10 – Facebook has currently just changed the “Become a Fan” button to the new “Like” button. We are awaiting any further changes to the Fan Box and once things appear to calm down we will update this tutorial. Keep checking back…
4/29/10 – This tutorial has been updated to allow full customization of the Facebook Fan Box and positioning of the new “Like” button.