How to Add Google Fonts to your WordPress Blog or Website
You may have seen our post ‘2017’s Top 5 Best Google Font Combinations for Website Development’ and wondered, how can I add Google fonts to my WordPress blog or website? In this tutorial we are going to teach you step by step how to select, customize, and embed your Google font of choice into your WordPress theme.
Step 1: Finding your Google Font
The first thing you need to do is figure out which Google font you actually want to use on your WordPress site. If you don’t already know which font you want to use, or just need some help, check out our post ‘2017’s Top 5 Best Google Font Combinations for Website Development’.
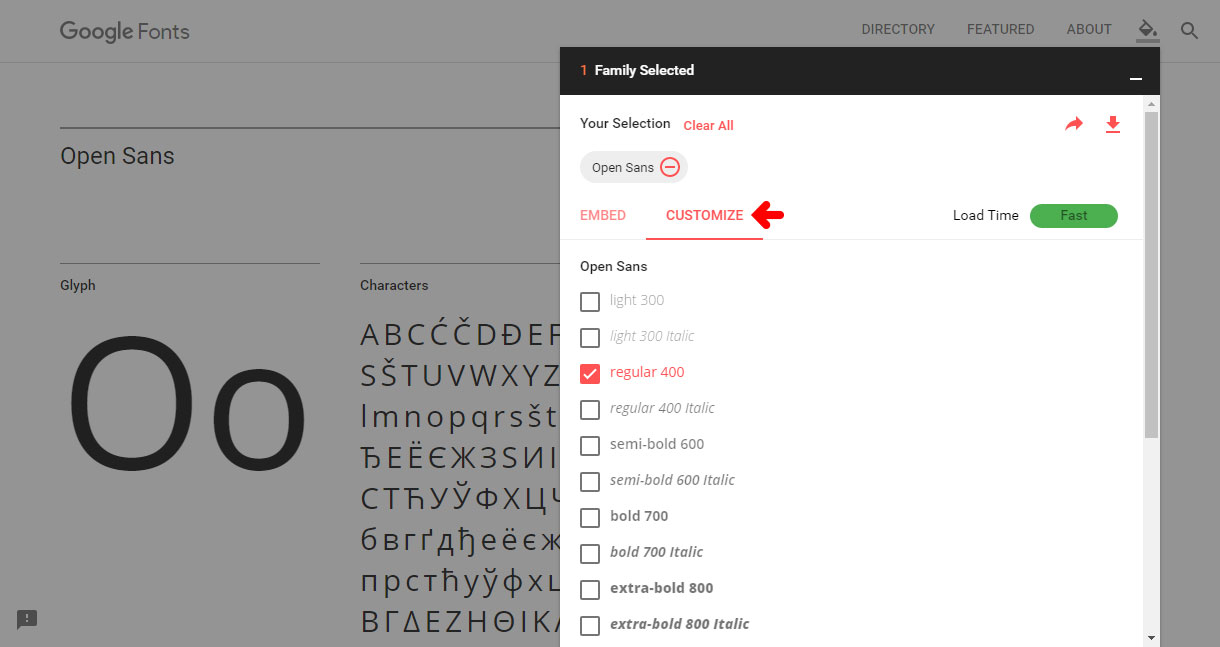
Step 2: Selecting and Customizing your Google Font
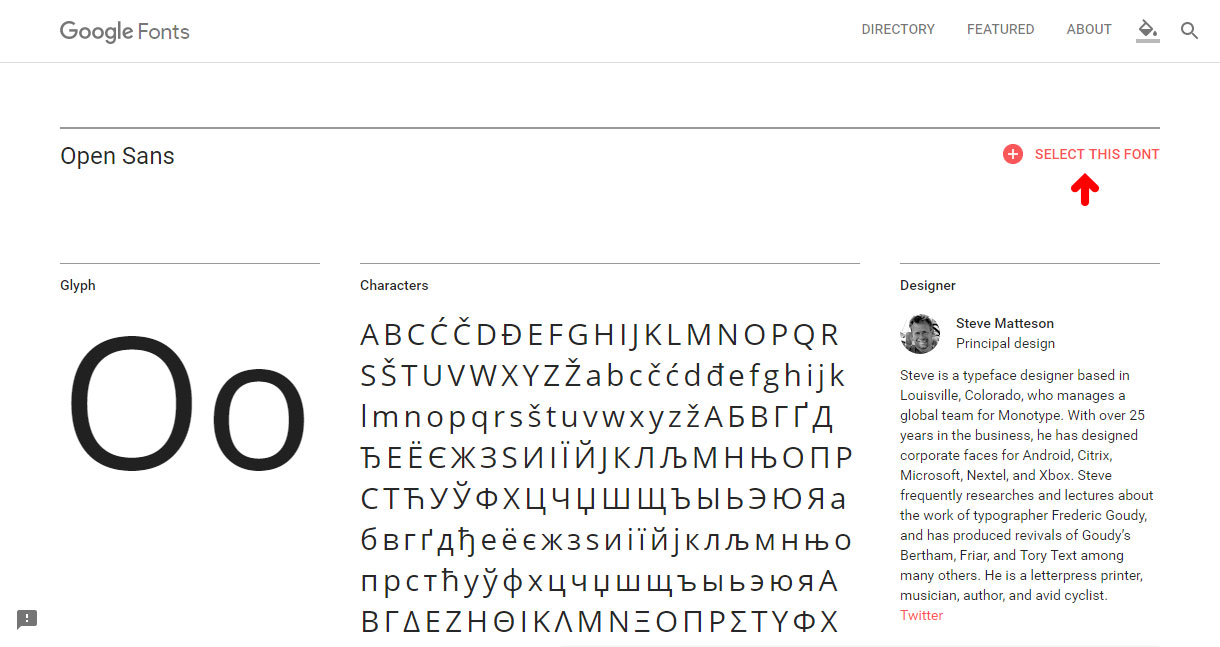
Once you’ve figured out which font you want to use, click on the ‘Select this Font’ button.
After you click the button a tab will appear in the bottom right corner of the screen, next open this tab to see embed and customization options.
The embed tab will give you two options for embedding the fonts to your WordPress site; we will go over these in the next step.
The customization tab will allow you to select which font styles you want to include, remember that the more styles you select the more loading time required.

Step 3: Which Embed Option to Use
In the third step we are going to be talking about the two embed options available; STANDARD vs. @IMPORT. While either method is acceptable to use, we prefer to use the ‘STANDARD’ method. The main reasoning behind this is that the ‘@IMPORT’ method blocks parallel downloads, which means the browser will wait for the imported file to finish downloading before it starts downloading the rest of the content. So make sure that you have ‘STANDARD’ option clicked and copy the link provided, see the example below.
<link href="https://fonts.googleapis.com/css?family=Open+Sans" rel="stylesheet">
Step 4: Adding your Google Font to your WordPress Theme
In the fourth step you will need to open and edit your header.php file, simply paste the link we copied from Google in Step 3 inside the tag.
Step 5: Specify your Google Font in your CSS Stylesheet
In the fifth step we will finalize the addition of the Google font to your WordPress theme’s stylesheet by specifying the following CSS rules.
font-family: 'Open Sans', sans-serif;There are different ways you can use the CSS rules to specify where the Google font family is being used. You could use it on call wherever you need to use it or you can set it up using a global class to be called in your html whenever necessary. We prefer the ‘Global Class Method’ because it creates cleaner lighter overall code.
On Call Method Example
H1{ font-family: 'Open Sans', sans-serif; }Global Class Method Example
.wf{ font-family: 'Open Sans', sans-serif; }<h1 class=”wf”>Title</h1>For a full guide on how to use Google fonts on your webpage, check out Google’s official Getting Started Guide for more tips and examples.
Troubleshooting
If you are having problems getting this tutorial to work please reread the tutorial and try again, if you still cannot get it to work please leave us a comment below and we will respond as soon as possible. Please do not email us with problems regarding this tutorial, only comments will be responded to.